Halloween Hairstyles Built From Buns, Braids, Waves and Sleek Styles
Halloween hair usually gets decided late. The costume is ready, the makeup is half done, and there are fifteen minutes left for hair. The good news is that almost every costume hairstyle is built from something you may already know how to do: two buns, a braid, big waves or a sleek low style. Change the placement, add one prop or a streak of temporary color, and an everyday style turns into a cat, a witch or a vampire.
That is how this guide is organized. The 14 looks below are grouped by the base style they start from, so you can pick the group that matches your skills and your hair length, then choose a costume inside it. Each one ends with a “Built from” line telling you the base, the time and any guide that covers the technique in more detail.
Quick Pick: Costume, Time and Length
| Look | Built from | Time | Minimum length |
|---|---|---|---|
| Cat ear buns | Two buns | 10 min | Chin |
| Devil horn twists | Two twisted buns | 10 min | Chin |
| Space buns with glitter | Two buns | 10 min | Shoulder |
| Bat wing bow | Half-up loop | 15 min | Shoulder |
| Witch braided crown | Dutch braids | 20 min | Collarbone |
| Spider web | Small sectioned ponytails | 20–25 min | Shoulder |
| Skeleton spine braid | One Dutch braid | 10 min | Shoulder |
| Medusa twists | Two-strand twists | 30–45 min | Chin |
| Hat-friendly witch waves | Loose waves | 15–20 min | Any |
| Mermaid waves | Waves plus thin braids | 20 min | Shoulder |
| Zombie bride updo | Teased messy bun | 15 min | Shoulder |
| Vampire low bun | Sleek low bun | 10 min | Shoulder |
| 1940s victory rolls | Pin curls and rolls | 25–30 min | Chin |
| 1920s finger waves | Gel waves on short hair | 20 min | Pixie to bob |
Built From Buns and Loops
Buns are the fastest route to a costume because placement alone changes what they read as. Two buns high on the head look like ears, two small cones at the front look like horns, and the same buns pulled to the very top become a playful space look. For the basic technique and which bun holds best on your hair, see our guide to bun hairstyles.
1. Cat Ear Buns
Part the hair down the middle and gather two high ponytails just behind the hairline, roughly where a headband would sit. Twist each ponytail, wrap it into a small bun and pin it. Then pinch the top of each bun into a point and pin the base on both sides so it holds a triangle shape instead of a circle. A light mist of hairspray keeps the points sharp.
Keep the buns small. Large buns read as space buns; small, pointed ones read as ears. On thick hair, use only the top section for the ears and leave the rest down.
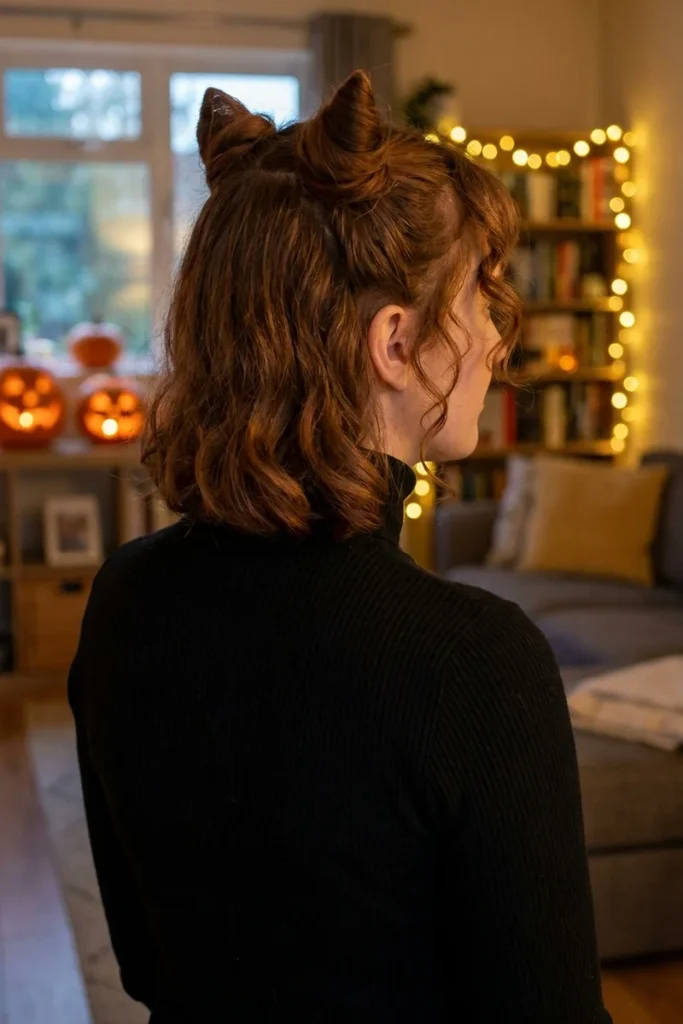
Built from: two high buns · 10 minutes · works on chin-length hair with mini elastics.
2. Devil Horn Twists
Take two small sections near the front of the crown, about two inches back from the hairline. Twist each section firmly in one direction until it starts to coil, then wrap it around itself into a tall cone and pin from the base. Backcombing the section lightly before twisting gives the horn more height and grip. A red temporary color spray on the horns only, with the rest of the hair left natural, makes the costume read from across a room.
Twist firmly along the length of the section, not at the roots. Pulling the hairline tight for a whole night is the quickest way to a headache and broken edges.
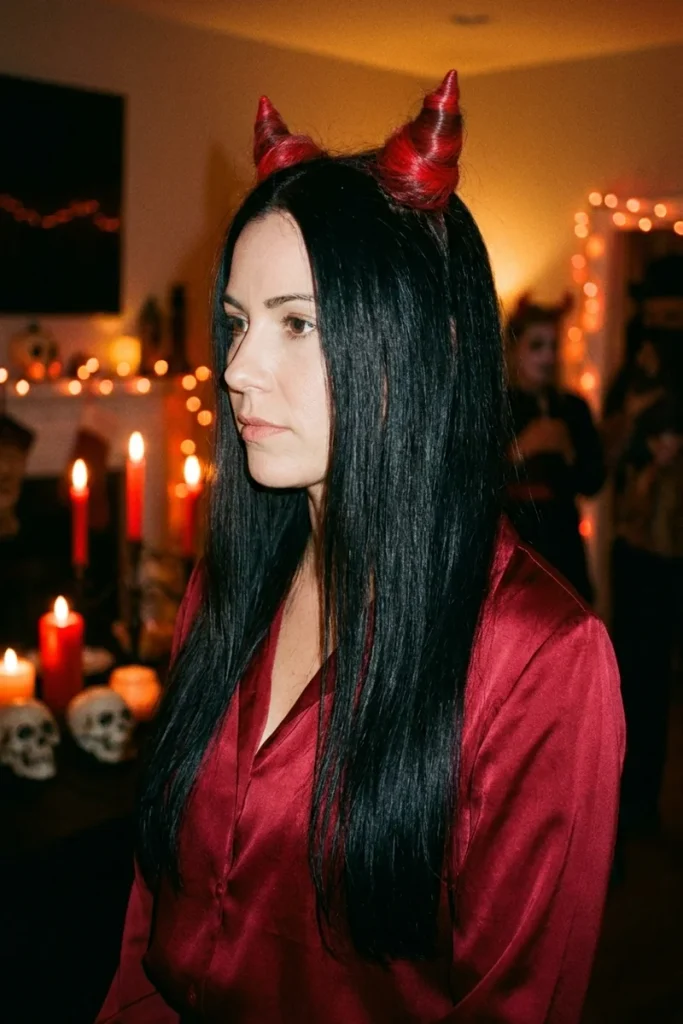
Built from: two twisted mini buns · 10 minutes · chin length and longer.
3. Space Buns With Glitter
The simplest look on this list: two buns placed high on the head, with a center part. What turns them into a costume is the finish. Add star clips or press a little hair glitter gel along the part for an alien or galaxy look, or a bright temporary color on the buns only. Leave a few face-framing pieces out so the look stays soft.
Built from: two high buns · 10 minutes · shoulder length works best.
4. Bat Wing Bow
Gather the top half of the hair into a half-up ponytail, but on the last pass through the elastic, pull the hair only halfway to form a loop. Split the loop into two equal halves, flatten each to the side and pin it down. Wrap the leftover ends over the center of the bow and pin underneath. To turn the bow into bat wings, pinch the outer edge of each half into two or three points and pin them. Dark hair shows the shape best; on light hair, a black clip at the center helps.
Built from: a half-up loop · 15 minutes · shoulder length or longer. More half-up variations are in our half up half down hairstyles guide.
Built From Braids
Braids hold all night, survive dancing and take props well, because pins and toy spiders have something to grip. If the braid itself is new to you, start with the technique guide linked in each look and practice once before the party.
5. Witch Braided Crown
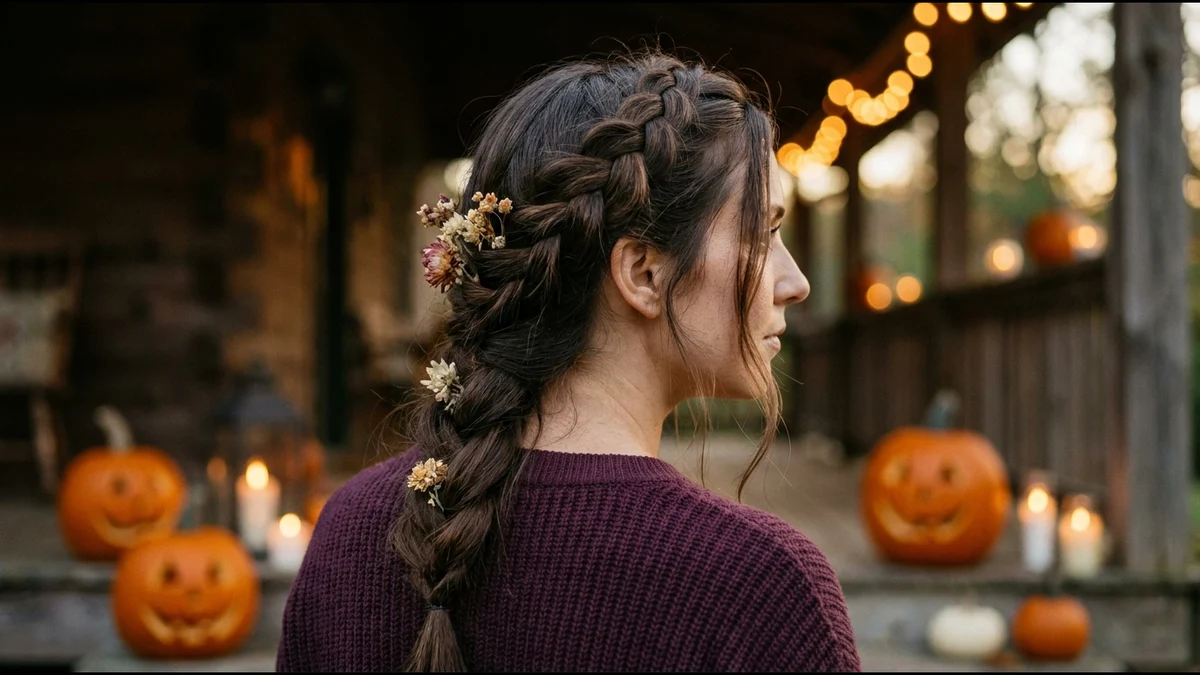
Two Dutch braids, one on each side, wrapped across the top of the head and pinned where they meet. Once pinned, gently pull the outer loops wider and tug out a few wispy pieces around the face so the crown looks slightly wild rather than neat. Tuck small dried flowers, black feathers or tiny moon charms into the braid. This version is for a witch without a hat; a pointed hat will not sit over a crown braid.
If your hair stops around the collarbone, a half-crown or a single braid across the front gives the same effect. Our crown braid styles show which versions work on shorter lengths.
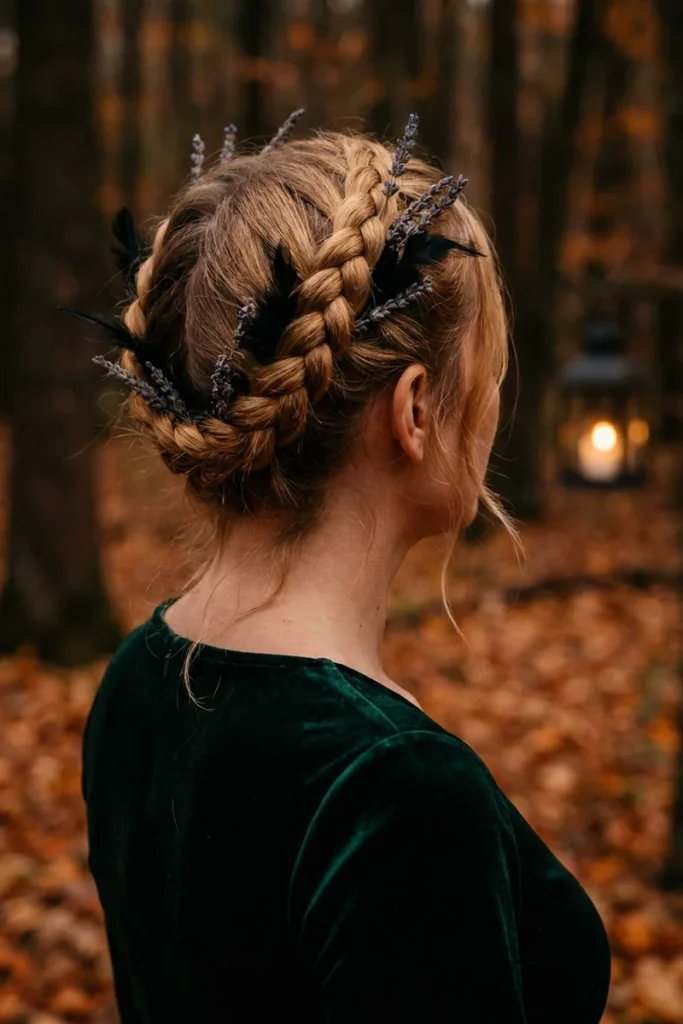
Built from: two Dutch braids · 20 minutes · collarbone length or longer.
6. Spider Web
This one looks complicated but uses only small elastics. Make a small ponytail at the center of the crown. Around it, make a ring of five or six small ponytails, like spokes on a wheel. Split each of those ponytails in half and join each half with the neighboring half using a new elastic a few inches lower. Repeat once or twice more as you work down the head. The connected sections form a net that looks like a web. Clip a plastic spider near the center.
Use clear or black snag-free elastics and keep each one firm but not tight. Hair that is a little dirty or sprayed with texturizer holds the sections in place better than freshly washed hair.
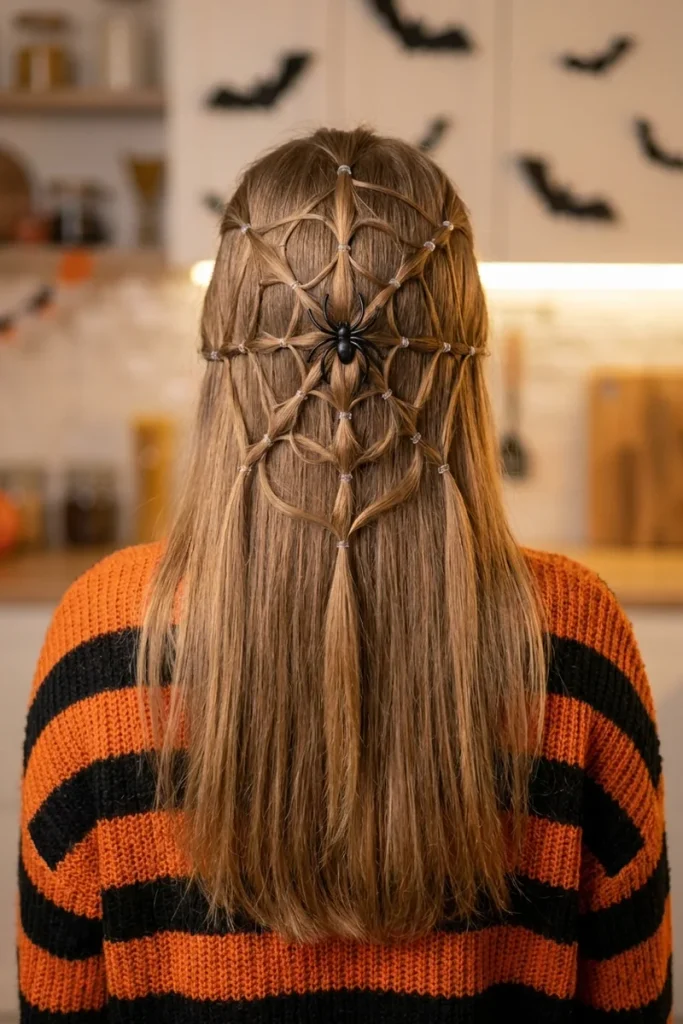
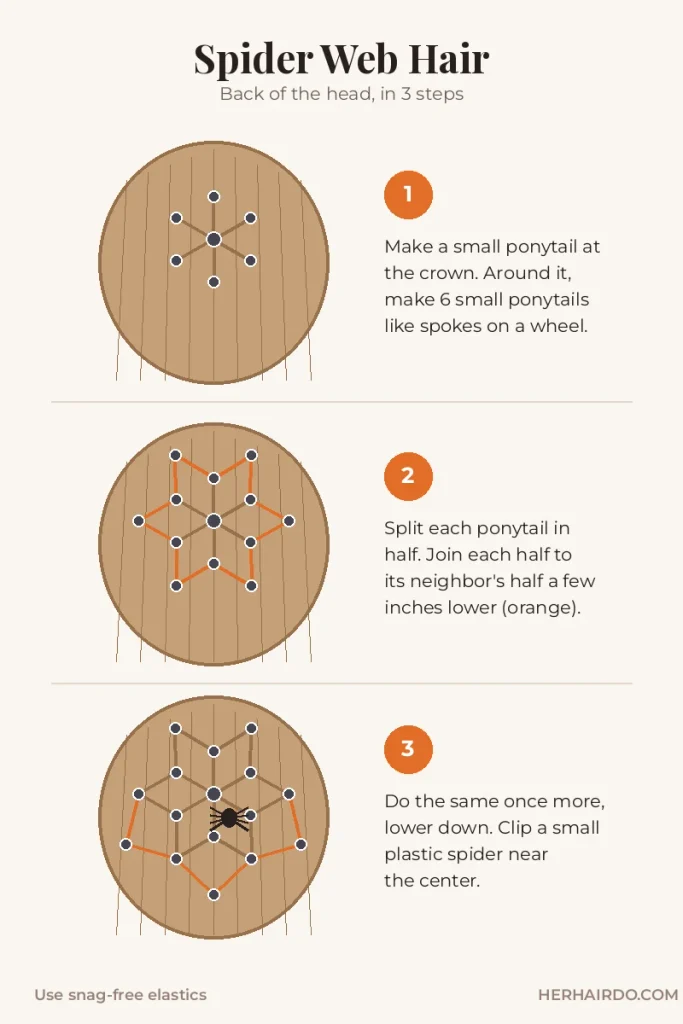
Built from: small connected ponytails · 20–25 minutes · shoulder length and longer.
7. Skeleton Spine Braid
A single Dutch braid running straight down the center of the head looks like a spine, especially with a skeleton costume or bone-print top. Braid a thin white ribbon into the middle strand for contrast, or pin small white plastic bones along the length. Because a Dutch braid sits raised on top of the hair, it shows the “vertebrae” effect better than a flat French braid. Our Dutch braid hairstyles guide covers the under-crossing step.
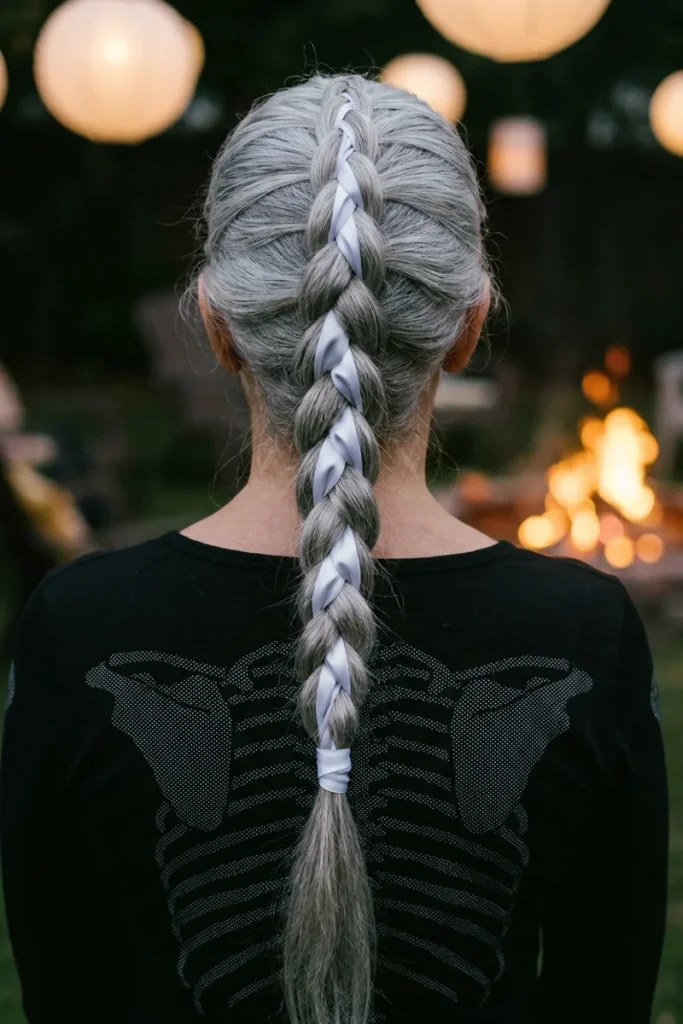
Built from: one Dutch braid · 10 minutes · shoulder length or longer.
8. Medusa Twists
Divide the hair into many small sections and two-strand twist each one from root to end. Pin some twists up and out at different angles so they look like they are moving, leave others hanging, and tuck small toy snakes between them. A green or gold temporary color on a few twists adds to the effect.
Curly and coily hair holds twists without any product beyond a curl cream, and existing braids or twists can be pinned up into the same shape. If you wear box braids, simply pin a handful of them up and out and add snakes. Our box braids guide explains how to avoid strain at the edges when pinning braids up.
Built from: two-strand twists · 30–45 minutes (less on hair already in braids) · chin length and longer.
Built From Waves and Volume
Big hair is the base for some of the most recognizable costumes, and it is the most forgiving group for beginners: messy is part of the look. These are also the best choices if you will be wearing a hat, crown or veil.
9. Hat-Friendly Witch Waves
A pointed witch hat flattens anything on top of the head, so put the volume below the hat line instead. Curl the hair in loose waves from the ears down, then brush them out and tease the lengths lightly for a wild, slightly frizzy shape. Leave the top smooth so the hat sits flat. A black or deep purple temporary streak on one side adds color without competing with the hat. To keep the waves from going flat once the hat comes off, try our hat-off fix for flat, static hair.
Built from: loose waves · 15–20 minutes · any length. Use heat protectant before curling; our heat damage guide explains how to choose the right temperature for your hair.
10. Mermaid Waves
Long soft waves with a few thin braids scattered through them, tied with clear elastics. Add small shell clips or pearl pins along one side, and spray the last few inches of the hair with teal, blue or lilac temporary color. On dark hair, pastel sprays barely show, so choose a brighter shade or use hair chalk on damp sections for more payoff.
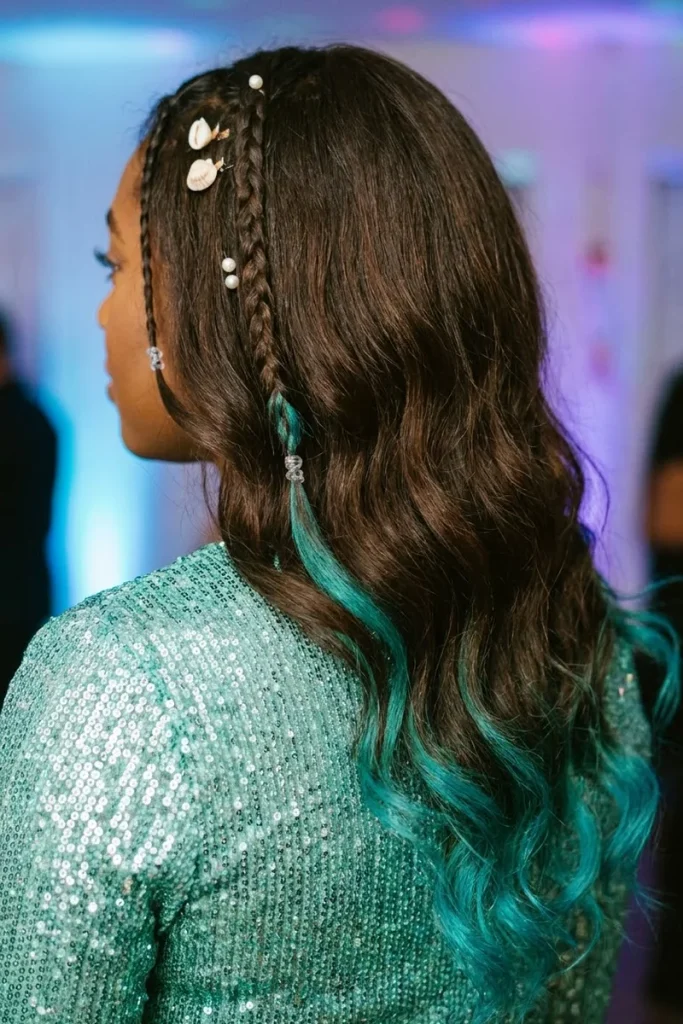
Built from: waves plus thin braids · 20 minutes · shoulder length or longer.
11. Zombie Bride Updo
Start with a loose bun or a messy updo, then undo the neatness on purpose. Tease small sections at the roots, pull pieces out around the face and at the nape, and leave a few strands sticking out at odd angles. Pin a torn veil or lace scrap at the back of the bun. Dry shampoo dusted at the crown gives the hair a dull, dusty look that suits the costume.
Teasing is fine for one night, but brush it out gently: see the removal steps further down.
Built from: a teased messy bun · 15 minutes · shoulder length and longer.
Built From Sleek and Vintage Styles
Sleek and vintage styles suit costumes that are about polish rather than props: vampires, old Hollywood ghosts, flappers and pin-ups. They are also the strongest group for short hair.
12. Vampire Low Bun
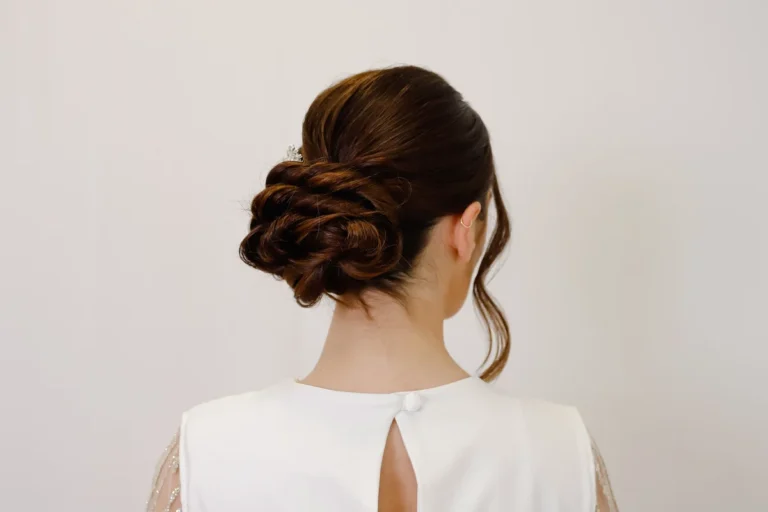
A deep side part, every strand smoothed back with gel or a strong-hold cream, and a tight-looking but comfortable low bun at the nape. The sharp part and glossy finish do most of the work. For a dramatic version, leave one sleek curl pinned flat at the temple. Paired with a dark lip, it reads as a vampire with almost no costume at all.
Smooth the hair with a brush, but keep the tension at the hairline gentle. Sleek and painful are not the same thing. A low bun with pins in an X pattern stays put without pulling.
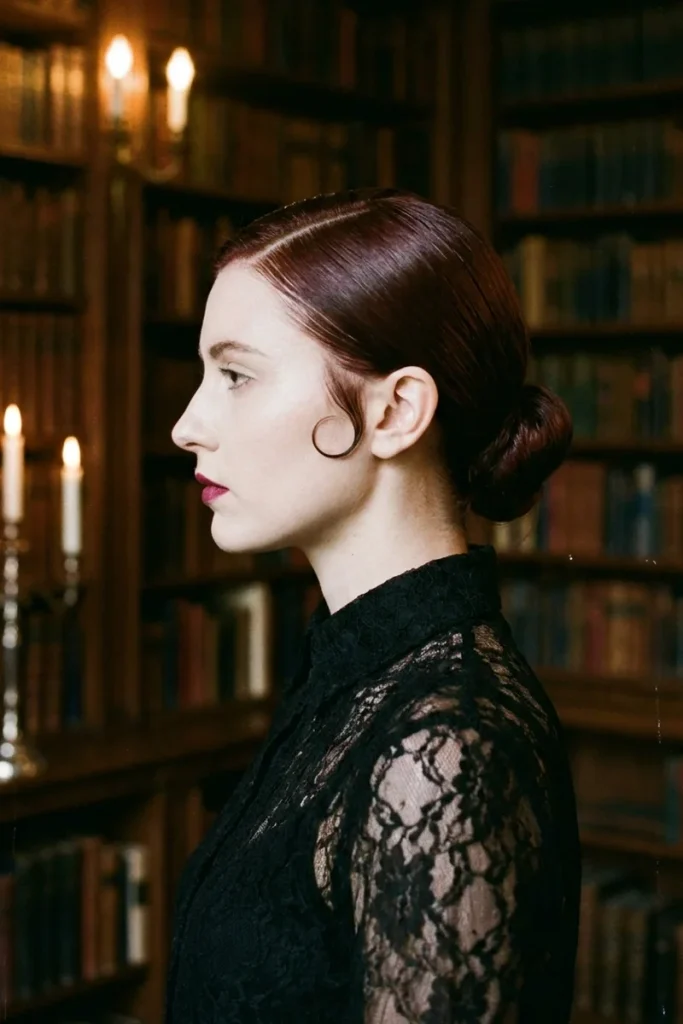
Built from: a sleek low bun · 10 minutes · shoulder length and longer. For a longer-lasting base, see our braided bun styles that hold.
13. 1940s Victory Rolls
Two rolls at the front of the head and soft curls at the back, the hairstyle behind classic wartime pin-up and riveter costumes. Curl the hair first, then take a section from each side of the part, roll it back over two fingers toward the scalp and pin the roll in place from underneath. A red bandana tied around the back and knotted at the top finishes the riveter look.
Built from: curls and pinned rolls · 25–30 minutes · chin length and longer.
14. 1920s Finger Waves
The best Halloween choice for a bob or a pixie. Apply a strong gel to damp hair, comb it into an S-shaped wave pattern close to the head and clip each ridge with flat duckbill clips until the gel dries. Remove the clips and finish with a jeweled headband or a feather clip. A deep side part works best. If the hair is too short to form full waves, a flat pin curl at each temple gives the same 1920s feel.
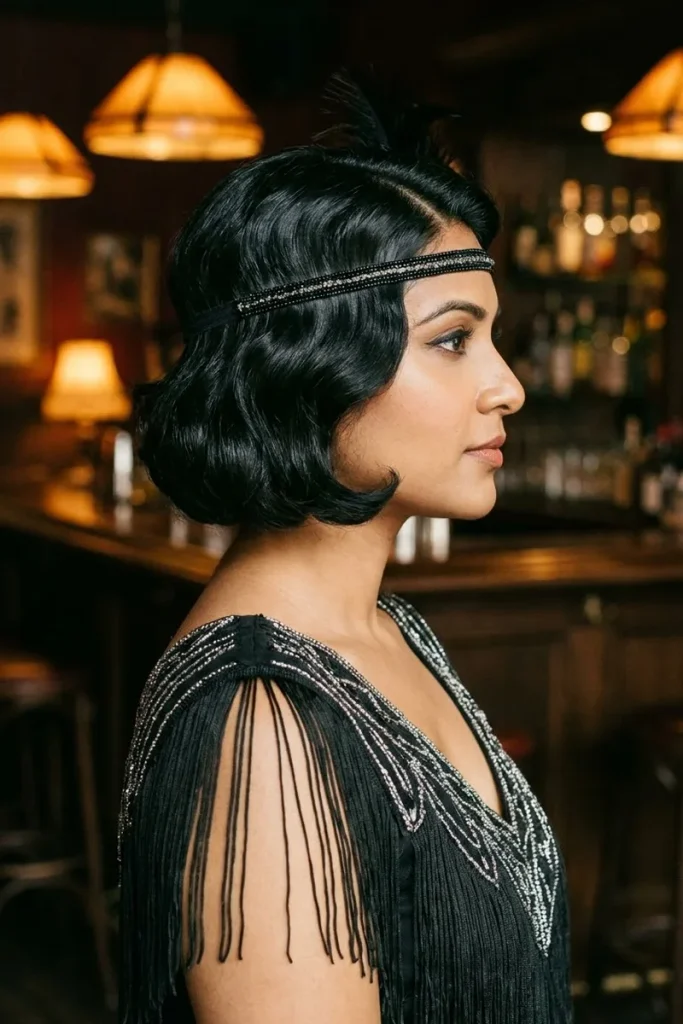
Built from: gel waves · 20 minutes · pixie to bob.
Short Hair? Start Here
Short hair rules out a few looks, but not many. These work from a pixie up to a chin-length bob:
- Pixie: finger waves (#14), a slicked-back vampire finish (#12 without the bun), or two tiny twisted horns at the crown (#2).
- Bob: mini cat ears or devil horns using only the top section, victory rolls (#13), or a single braid across the front as a half witch crown.
- Any short length: a headband with ears or horns over smooth hair, plus a streak of temporary color.
More ways to pin up short hair are in our guide to updos for short hair.
Temporary Color: What to Use on Your Hair
Temporary color is meant to wash out, but results depend on your base color and how porous your hair is. Lightened, bleached and gray hair absorb pigment more easily, so a shade that rinses out of dark hair in one wash can leave a faint tint on blonde.
| Type | Shows best on | Removal | Watch out for |
|---|---|---|---|
| Color spray | Light and medium hair | One or two shampoos | Transfers onto collars, pillows and skin; stiff feel |
| Hair chalk | Dark hair (applied to damp sections) | One or two shampoos | Can dry the hair; dusts off onto clothes |
| Color wax or gel | All shades | One or two shampoos | Heavy on fine hair; can look greasy |
| Glitter gel | All shades | Shampoo plus conditioner | Glitter travels; keep it along the part |
A few rules keep it simple: test the product on a hidden strand first if your hair is bleached or gray, apply to dry hair unless the label says otherwise, cover your shoulders while spraying, and protect light pillowcases with an old towel. If you’re planning a semi-permanent color for fall anyway, our burgundy hair color ideas explain how the shade fades on different bases.
Taking It All Out Without Damage
Most Halloween hair damage happens on November 1, when teased, sprayed and pinned hair gets brushed out in a hurry. A slower take-down saves a lot of breakage:
- Remove every pin and elastic first, and cut snag-free elastics out with small scissors rather than pulling them.
- Work a little conditioner or hair oil through teased sections while the hair is still dry.
- Detangle from the ends up with your fingers, then a wide-tooth comb. Never brush teased roots downward.
- Wash with a clarifying or regular shampoo to lift spray, color and glitter, then condition well.
- If your scalp feels itchy after heavy product or glitter, a gentle wash routine helps; our scalp care routine explains what to skip.
If ends feel rough or snap easily afterward, our guide to hair breakage causes and fixes covers what to do next.
For Kids
Kids’ costume hair should be quick, comfortable and easy to take out before bed. Cat ear buns, space buns and the spider web all work on children, as long as the elastics are small and soft and nothing pulls at the hairline. Skip heavy props on young kids, and patch-test color sprays on a strand first. For more quick styles, see our Christmas hairstyles for kids, sorted by how much time you have.
Halloween Hairstyles FAQ
How do I make buns, ears or horns hold all night?
Start with hair that has some grip: second-day hair or a texturizing spray works better than freshly washed hair. Secure each bun with an elastic first, then pins crossed in an X, and finish with a strong-hold hairspray. Braided bases hold props better than smooth hair.
Is colored hair spray safe on bleached or blonde hair?
Usually, but it can leave a faint tint, especially with blues, greens and purples on porous or very light hair. Test a hidden strand first and wash it out the next day rather than sleeping in it for several nights.
Can I do my Halloween hair the night before?
Braided looks such as the spine braid or witch crown can be done the night before if you sleep on a satin pillowcase. Buns, waves and teased styles look best done the same day. Temporary color is better applied just before you leave so it doesn’t transfer onto bedding.
What is the easiest Halloween hairstyle without a costume?
The vampire low bun or the cat ear buns. Both take about ten minutes, use no props, and read clearly as a costume with simple makeup.
Before You Head Out
Pick your base first, then the costume: if you can make two buns, you have three costumes; if you can Dutch braid, you have three more. Do a quick practice run a day or two before, keep spare pins in your bag, and plan the take-down as carefully as the style. For other events this season, our festive hairstyles are sorted by the kind of party they need to survive.