
Dutch Braid Hairstyles: The French Braid Reversal That Builds Instead of Lays Flat
Dutch braid hairstyles get described as a “fancier” French braid, or as a completely different style altogether. It’s neither. It’s the exact same three-strand motion as a French braid, with one crossing direction reversed: instead of crossing each strand over the middle strand, you cross it under. That single change is the whole story. Over-crossing pulls the braid flat and inset against the scalp. Under-crossing pushes it up and out — the braid sits raised on top of the hair instead of woven into it. That’s why a Dutch braid looks so much bolder from a distance: it isn’t a different braid, it’s the same braid built in the opposite direction.
Below are 15 Dutch braid hairstyles built around what that raised structure actually does differently — not the same braid photographed from 15 angles.
Before You Start
Tension decides whether it’s actually a Dutch braid or just a loose French braid that leans a little. The raised, three-dimensional look that defines a Dutch braid only shows up when each cross is pulled firm and consistent. Braid it loosely and the under-cross relaxes back toward flat, and from a few feet away it reads as a slightly messy French braid instead of a Dutch one. If the style you want depends on that raised ridge — and most of the ones below do — tension isn’t optional.
Single braid versus double braid isn’t a style choice, it’s a category choice. One centered Dutch braid down the back of the head reads as sleek and editorial. Two parallel Dutch braids (commonly called boxer braids) read as sporty and structured, even using identical technique and identical hair. Decide which category you’re going for before you section the hair, because splitting one planned braid into two halfway through changes the width, tension, and finish of both.
1. The Classic Single Dutch Braid

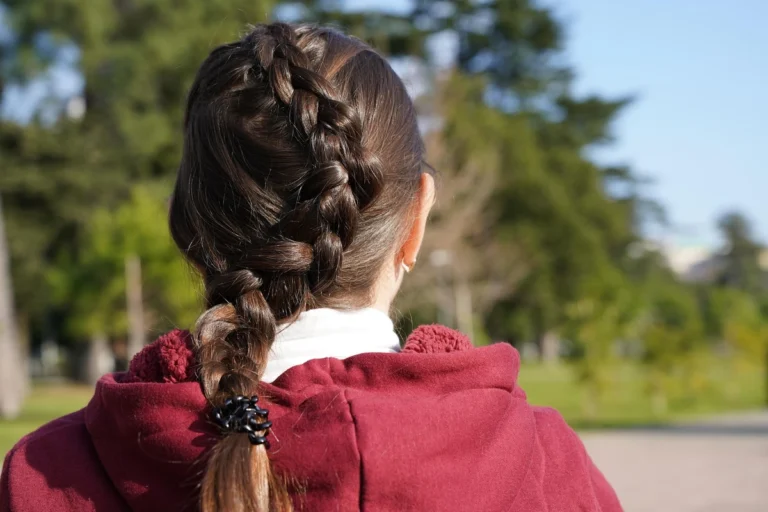
Start at the crown with three even sections and cross each new strand underneath the middle strand instead of over it — the one deliberate reversal that defines every style on this list. Keep tension firm the whole way down so the braid sits proud of the scalp rather than sinking into it. This is the baseline version, and it’s worth doing first even if you’re after a more elaborate style further down, because it’s the easiest way to actually feel the under-cross motion until it’s automatic.
2. Double Dutch Boxer Braids

Section the hair down the center and braid two identical Dutch braids close to the scalp, keeping them tight and structured rather than pancaking or loosening them afterward. Unlike softer double-braid styles, boxer braids are meant to look deliberately controlled — every stitch even, no stray pieces. That tightness is also what makes them functional: they’re the version built to survive a workout or a full day outdoors without loosening at the part line.
3. Pancaked Wide for Editorial Volume
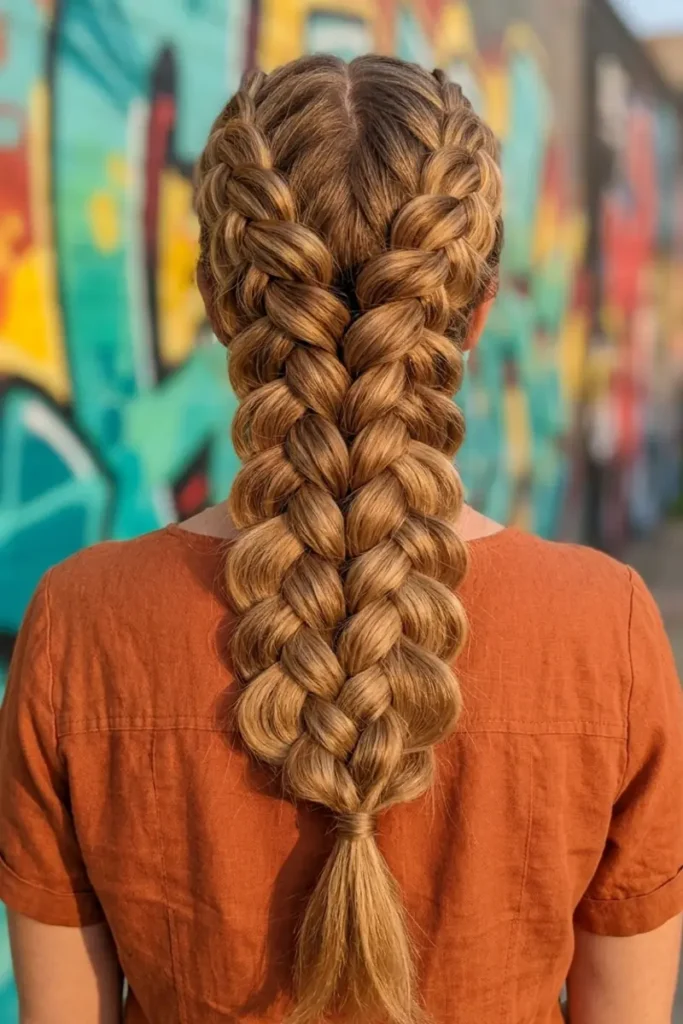
Braid a single Dutch braid with normal tension, then gently pull each stitch outward from both sides once you reach the end — the same widening trick used on fishtail and waterfall braids, but with a different starting shape to work from. Because the Dutch braid already sits raised instead of flat, pancaking it doesn’t just add width, it adds height too, which is why this version photographs so differently from a pancaked French braid of the same length.
4. Full Dutch Crown, No Beginning or End
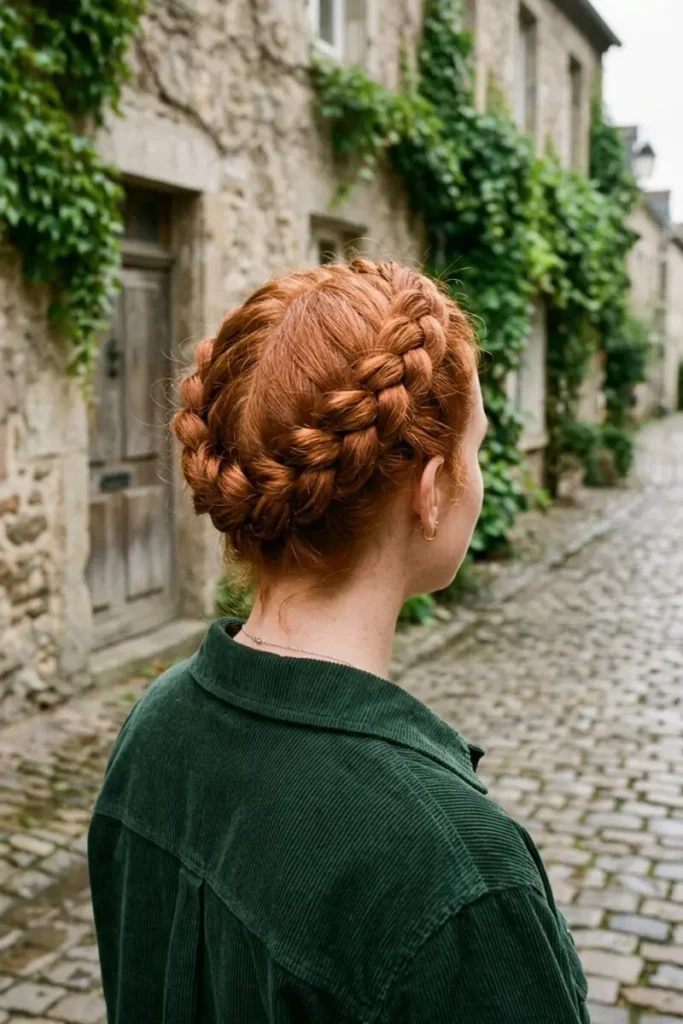
Work the Dutch braid all the way around the head until it closes into its own starting point, exactly like a French crown braid, but with the under-cross reversal applied throughout. The difference shows immediately: a French crown sits flat like a woven headband, while a Dutch crown sits raised like a halo lifted slightly off the scalp. Keep tension identical at the start and the finish, or the seam where the circle closes will sit visibly flatter than the rest.
5. Dutch Braid Into a High Ponytail
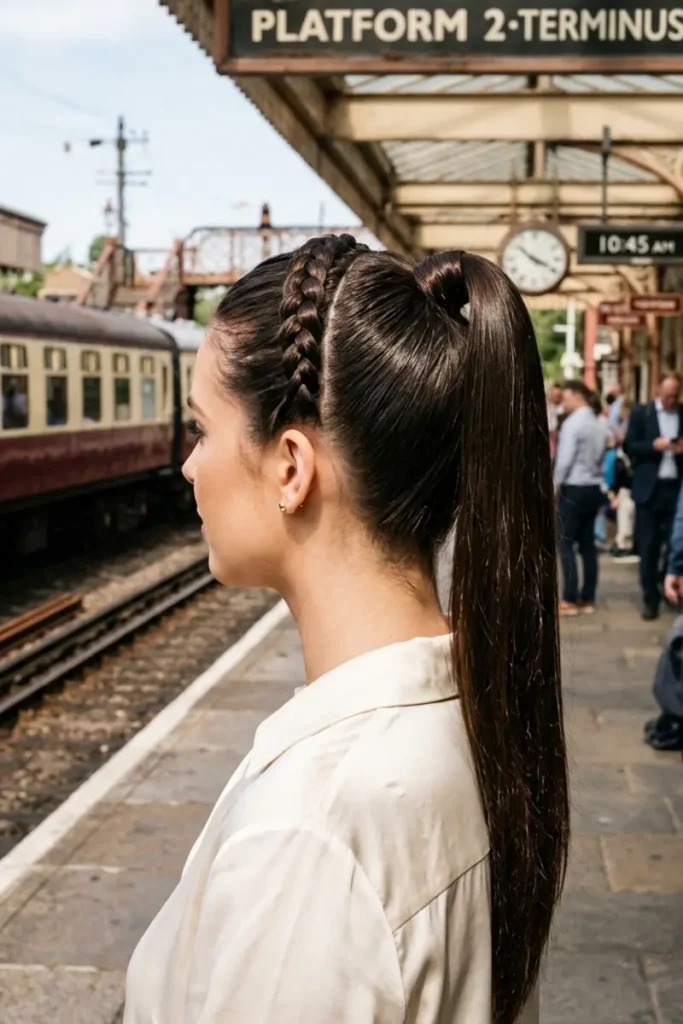
Braid a single Dutch braid from the front hairline back to the crown, then gather it with the rest of the hair into a high ponytail. Because the braid was built raised rather than flat, it stays visible as a textured strip running over the top of the ponytail instead of disappearing once the hair is gathered — a French braid used the same way tends to flatten out and blend in once it’s pulled up.
6. Reverse-French Half-Up
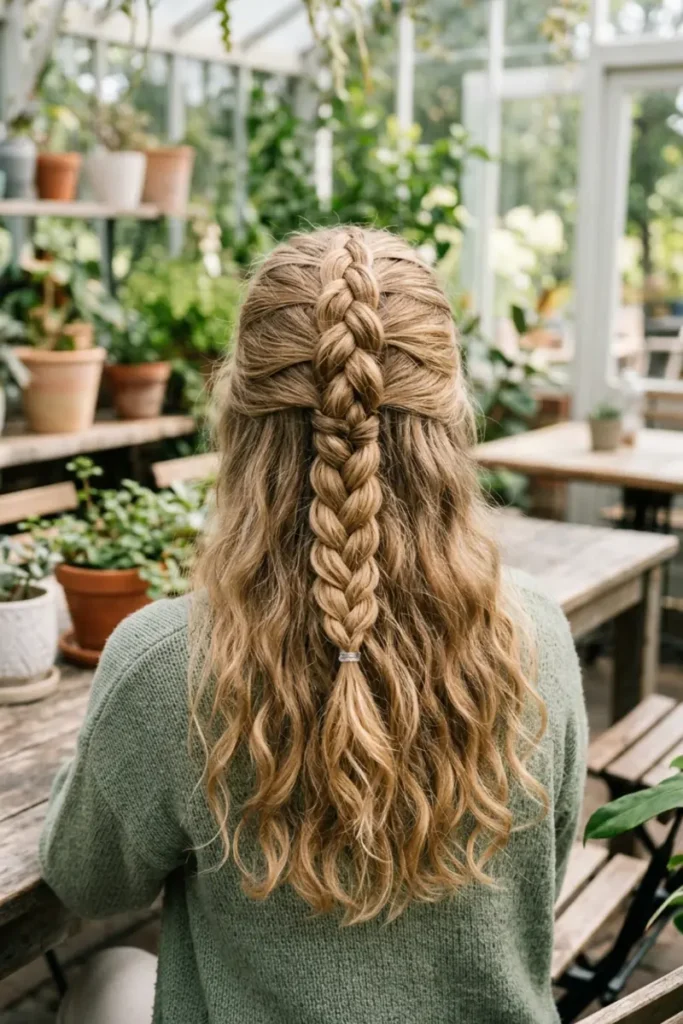
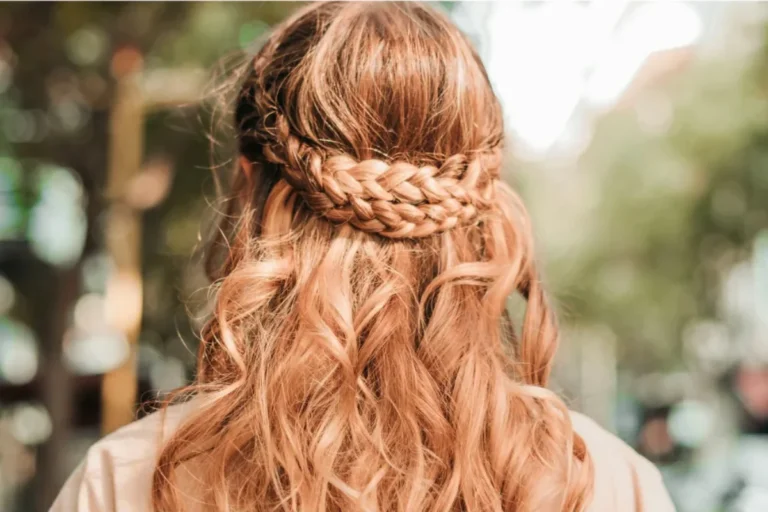
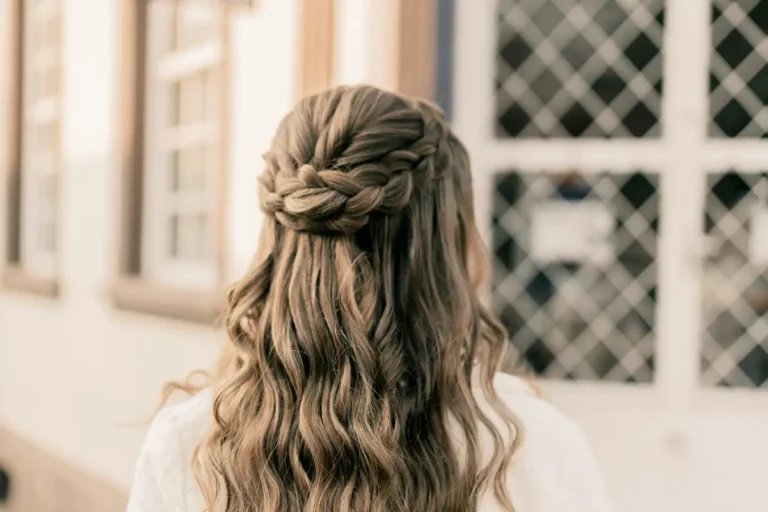
Section off only the top portion of hair and Dutch braid it back toward the crown, leaving the rest down. Secure the braided section with a small elastic or pin instead of continuing into a full braid. The raised texture reads clearly against the loose hair underneath, giving you a half-up style with visible structure on top rather than a flat braided strip that gets lost in the rest of the hair.
7. Dutch-to-Fishtail Transition
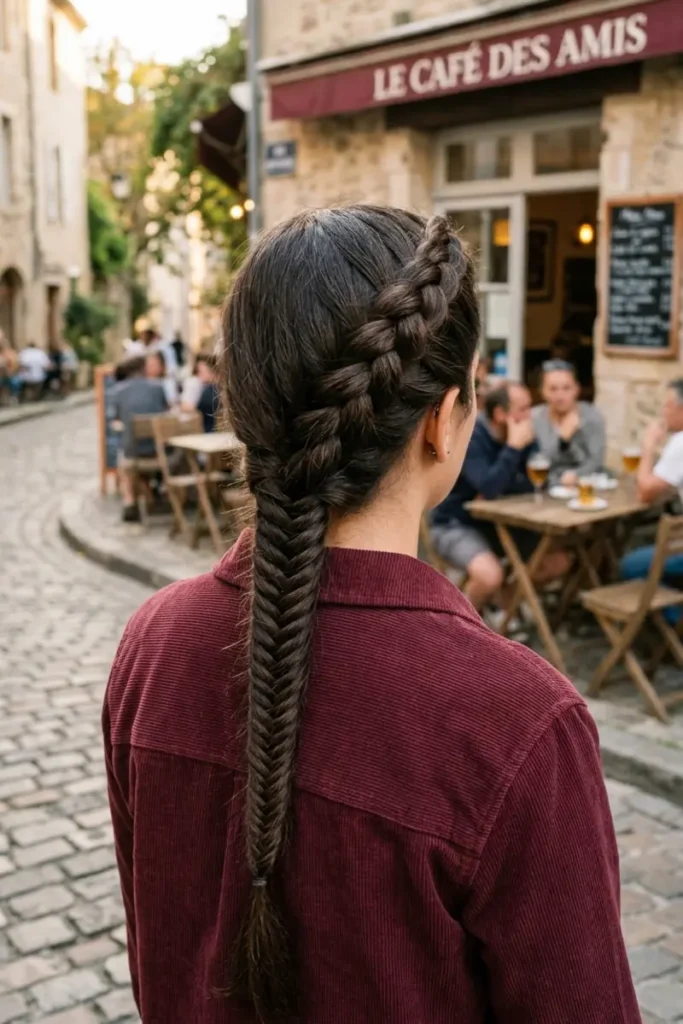
Start a Dutch braid at one temple, working it about halfway down, then switch entirely to a fishtail braid for the remaining length. This transition works more seamlessly than pairing a fishtail with a French or waterfall braid, because fishtail braiding is also an under-cross motion — the two techniques hand off to each other without a visible change in how the strands sit, only a change in section count.
8. Built for Curly and Coily Hair
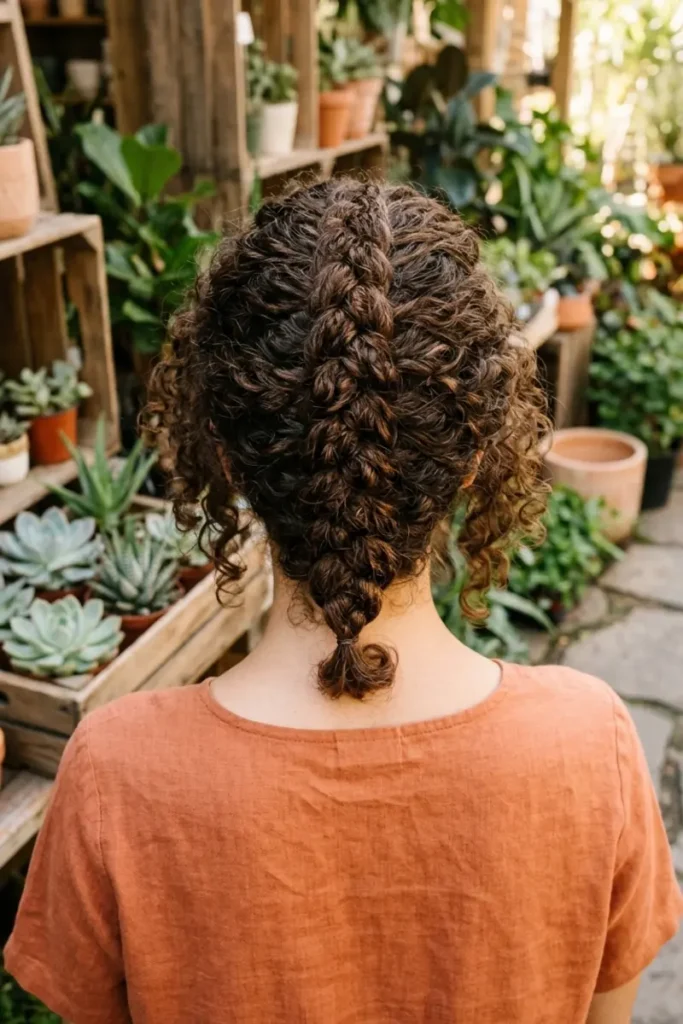
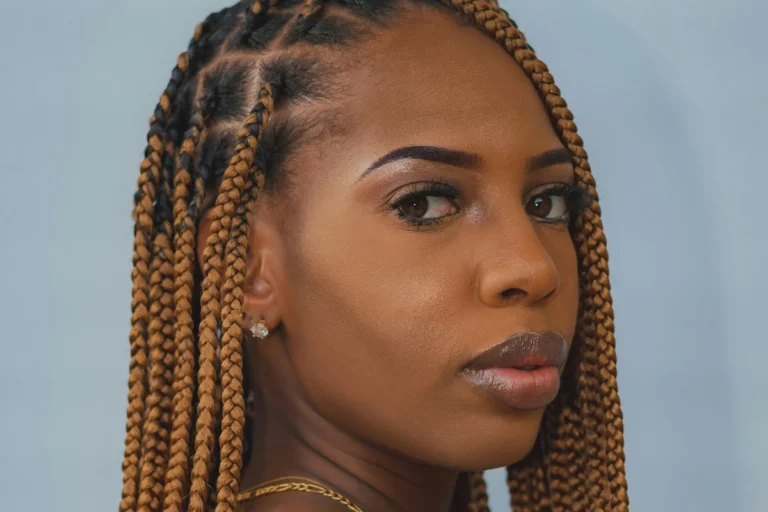
On curly or coily hair, section on fully dry, defined curls and keep each Dutch cross slightly looser than you would on straight hair — curl pattern already pushes the braid outward, and full tension on top of that can pull individual curls out of shape. The raised structure that makes a Dutch braid stand out on straight hair does something different here: it works with the hair’s natural volume instead of fighting it, so the braid reads as an extension of the curl pattern rather than a flattened section running through it.
9. Compact Version for Short Hair

On hair at or just past the jaw, work three to five stitches from the temple toward the back and pin the short tail flat against the head. Short Dutch braids actually show their raised structure more clearly than long ones, simply because there’s less length for the ridge to get lost in — the trade-off with short hair isn’t visibility, it’s security, so pin the end well rather than relying on the braid’s own tension to hold it.
10. Dutch Pigtails for Kids
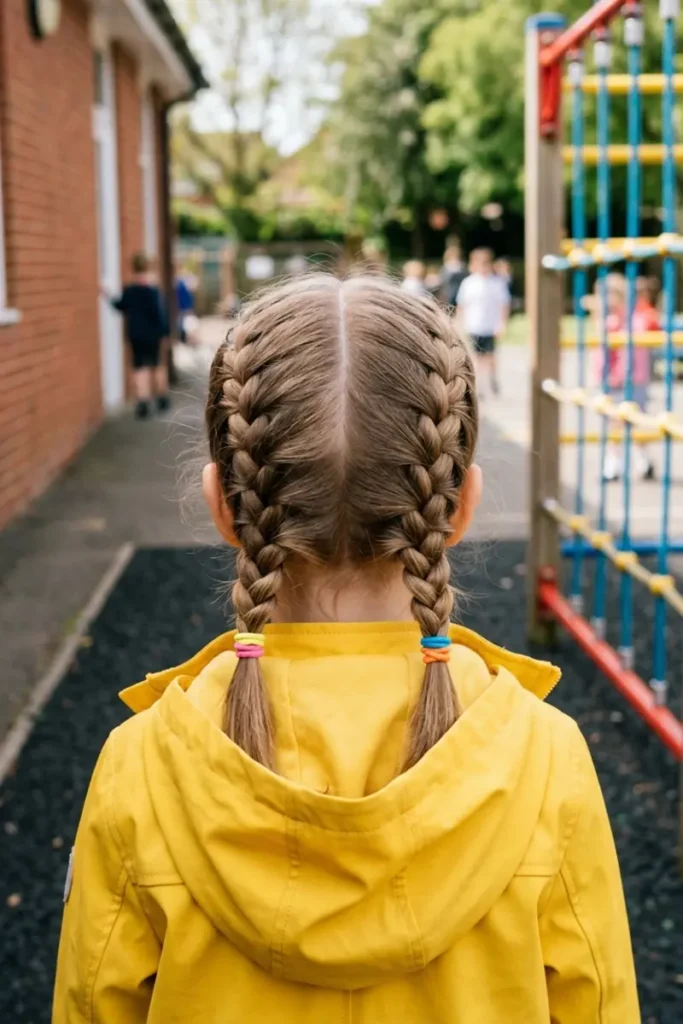
Part the hair down the center and Dutch braid each side into a low pigtail, keeping tension gentle but even — a child’s finer hair needs less pull to hold shape than adult hair does. The practical case for Dutch over French here isn’t cosmetic: the raised structure resists flattening from hats, car seats, and pillows better than a flat French braid does, which is why it tends to survive a full school day with less frizzing at the crown.
11. Threaded With Ribbon or Metal Cuffs
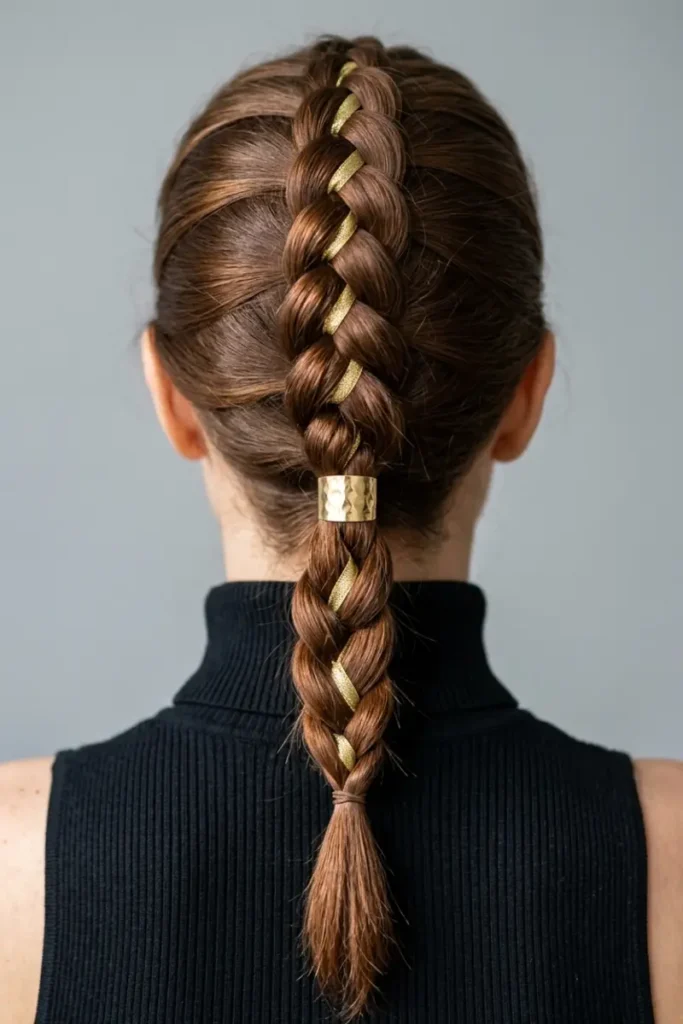
Weave a thin ribbon through every other stitch as you braid, or slide a metal cuff onto the finished braid partway down — the accessory needs to go in during the braiding itself, since threading it through afterward disturbs the raised stitches. Because the braid sits proud of the scalp rather than flat against it, whatever you thread through sits visibly on top of the texture instead of getting buried inside it.
12. Dutch Braid Wrapped Into a Bun
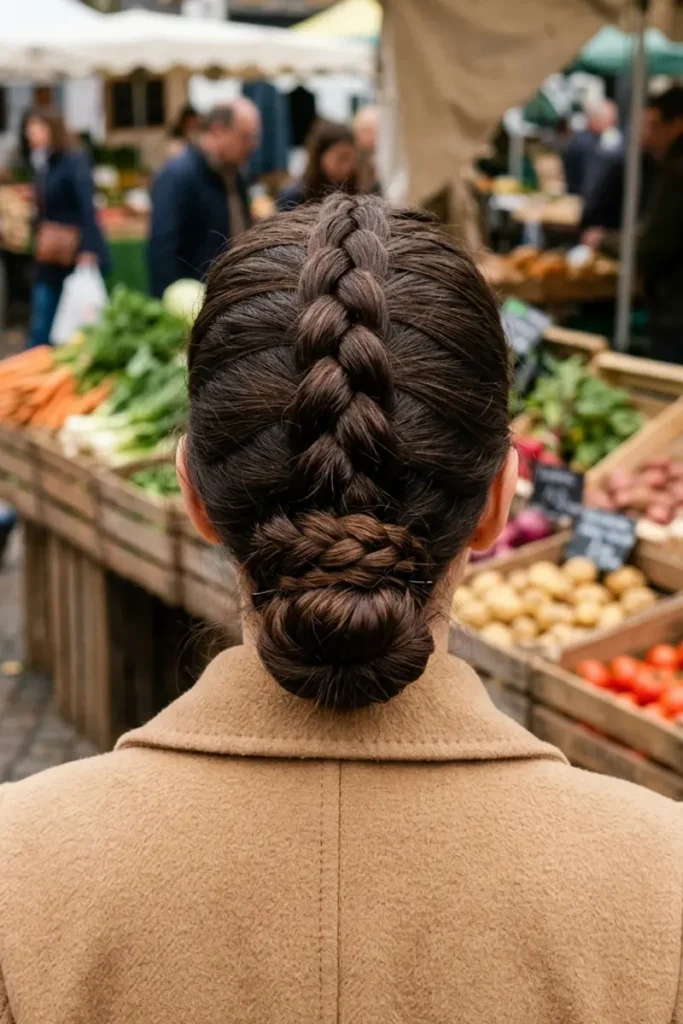
Braid a single Dutch braid down to the nape, then instead of pinning the tail flat, coil it around the base of a low bun and secure with pins. The raised ridge of the braid stays visible where it meets the bun, giving the style a clear point of transition instead of the braid disappearing seamlessly into the bun’s base.
13. Bridal Dutch Crown With Twisted Sections
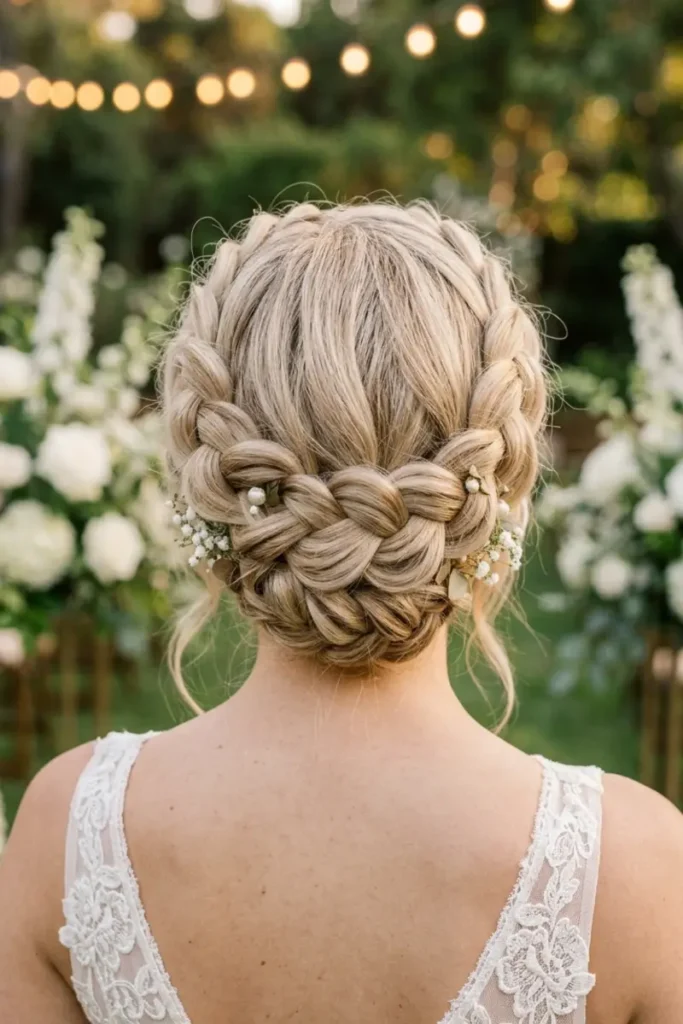
Work a full Dutch crown around the head, then twist a few small loose sections into the crown as you go for added texture, tucking the tail invisibly where the braid closes. The tighter, more structured hold of a Dutch crown compared to a French one is the practical reason to choose it for a wedding day specifically — it’s built to hold shape through a full day of photos and dancing with less need for a mid-event fix.
14. Diagonal Dutch From Temple to Shoulder
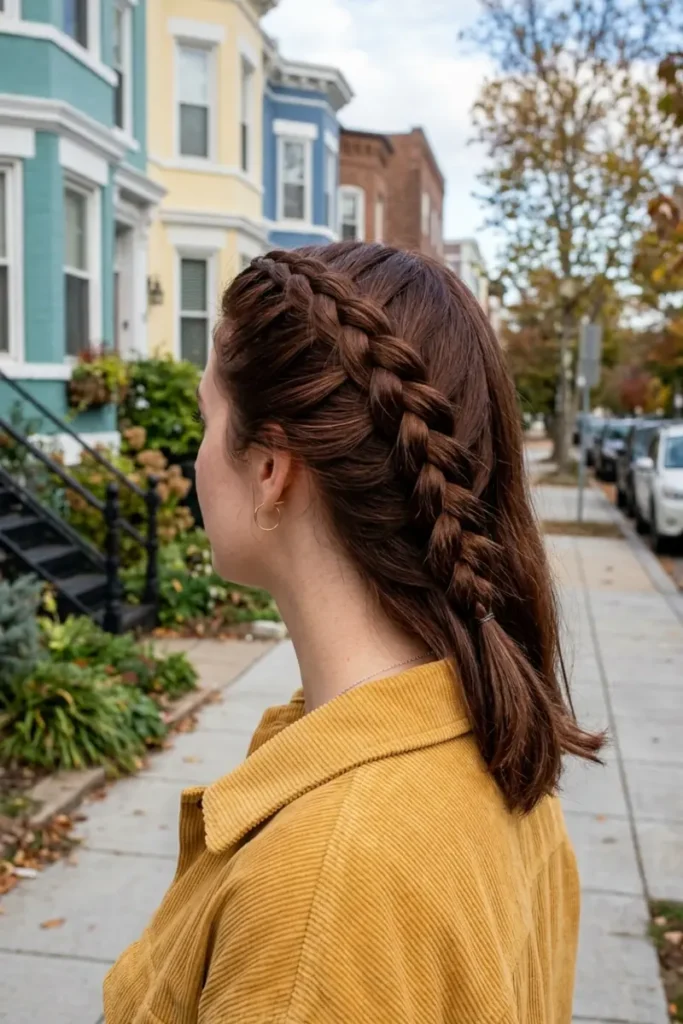
Angle the braid from a high temple down toward the opposite shoulder instead of braiding it level across the back of the head. Because the braid sits raised rather than flat, the diagonal line reads as a distinct ridge of shadow and light across the head — a diagonal French braid at the same angle tends to blend flatter into the surrounding hair, while a diagonal Dutch braid stays visually separated from it the whole way down.
15. Double Dutch Into Space Buns
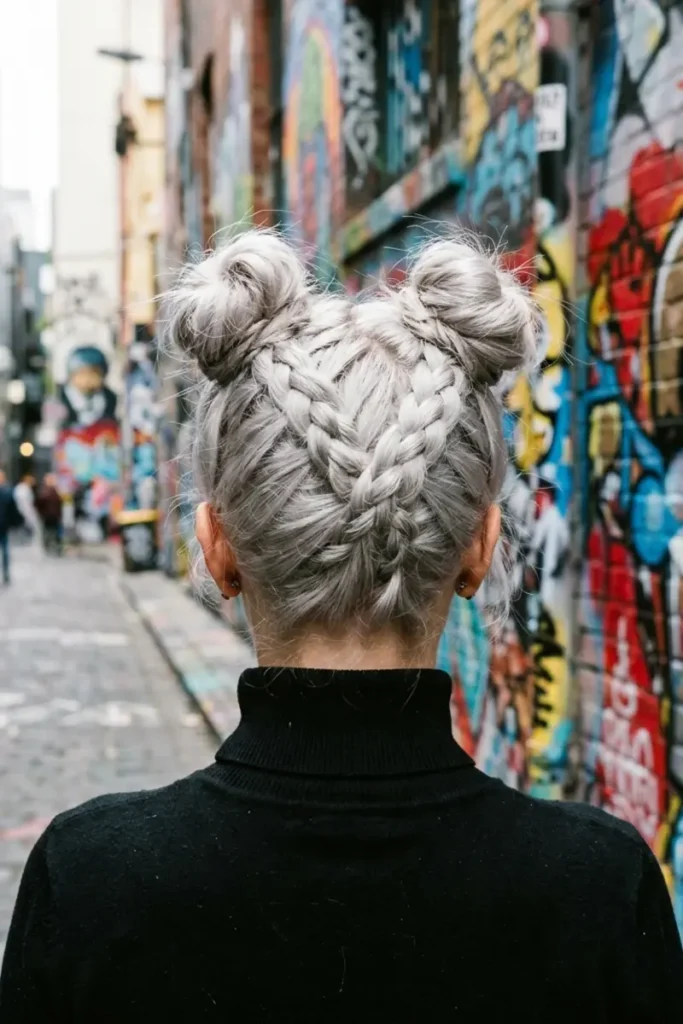
Part the hair into two sections and Dutch braid each one from the temple back to the crown, then gather each braided section into its own high bun. The raised texture of each braid stays visible running into the base of its bun, so even from the front the style reads as braided rather than just as two plain buns — a small detail that a flatter French version of the same style tends to lose.
FAQ
What’s the actual difference between a Dutch braid and a French braid?
Both use the same three-strand motion. A French braid crosses each new strand over the middle strand, which pulls the braid flat and inset against the scalp. A Dutch braid crosses each new strand under the middle strand instead, which pushes the braid up so it sits raised on top of the hair. The hand motion is nearly identical; only the crossing direction changes.
Is a Dutch braid harder than a French braid?
Not mechanically — it’s the same three strands and the same rhythm, just reversed. Most people find it briefly awkward only because their hands default to the French braid’s over-cross out of habit. Once that reflex is unlearned, the two techniques take roughly the same amount of practice.
Does a Dutch braid actually last longer than a French braid?
Often, yes, for a specific reason: the raised structure sits slightly proud of the scalp instead of flush against it, so it takes more friction — from hats, pillows, or activity — to flatten it out. A French braid, being flatter to begin with, has less structure to lose before it starts looking undone.
Can you do a Dutch braid on short or thin hair?
Yes. Short hair actually shows the raised texture more clearly than long hair does, since there’s less length for the ridge to disappear into. Thin hair holds the shape less firmly, so keep sections small and pin the ends rather than relying on the braid’s own tension to secure it.
Why does my Dutch braid look flat instead of raised?
Almost always tension. The raised look depends on each cross being pulled firm and even; braid loosely and the under-cross relaxes back toward flat, which is what makes a loose Dutch braid look like a slightly messy French braid instead. Tightening tension, not changing technique, is usually the fix.
Closing
The Dutch braid gets treated like a separate skill from the French braid, but the actual difference is one reversed cross, repeated down the head. If you’ve already got a French braid’s rhythm down — and if you’ve read our French Braid Hairstyles guide, you have — you’re one deliberate change away from the raised, dimensional version of the same technique. And if you want to see that same reversal used mid-braid rather than throughout, our Waterfall Braid Hairstyles guide shows exactly where an under-cross section fits into a dropped-strand style. And our Bun Hairstyles guide picks up the braided spiral bun mechanism this technique feeds into, if you’d rather gather the braid up than wear it down.